MODIFICATIONS
& TECH TIDBITS
of the mirrors on your MH. It's not perfect,
but it brings them up to SBK level (which are
still usable). I took a screwdriver and from
the small hole on the bottom I loosened the
mirror ball all the way. Then, the mirror
lens was pried out. Then, I took a razor and
separated the glass from the mount, and
fabricated a Delrin wedge on my belt sander.
The theory is to put the lens pointed further
skyward rather than at the ground. So,
once that was done I adhesived the wedge to
the lens, then the wedge to the mount. stuck
the mount back in the housing, and
tightened up the screw.
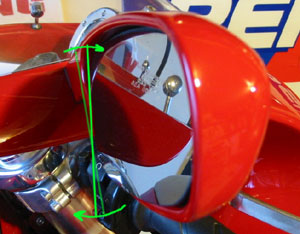
angle is further up. This makes it so you only have to dip your head rather than crouch full down. A
worthwhile mod in my opinion.
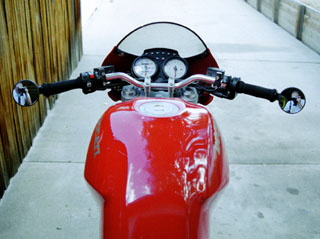
End Wrenches
You can't see a damn thing out of them and they are hideous.
So, I got these 3rd Eye brand bicycle mirrors to solve my
problem. They were $25 for the pair from a local bike shop, were
easy to install, you can see out of them, and they are even glass!
A great deal compared to others that cost upwards of $80. To get
the stock mirror off you simply take your 14mm end wrench and
unscrew the base (after pulling back the rubber boot). If you
have a fairing that gets in the way, you may need to loosen the
17mm lock nut first so you can swing them out of the way.
a rubber bushing. Super easy. Make SURE your bar is not solid and can accept bar end mirrors BEFORE cutting :)
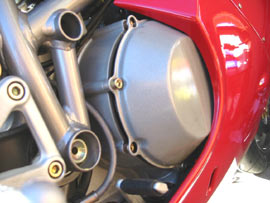
it off for a while but have finally got my brother to make me these caps on his
lathe. They are turned aluminum with a regular ol' bolt screwed into the
underside (which in turn screws into the holes) and a slot cut in the face to
form the Ducati logo. They look VERY snazzy on the bike. An alternative
would be a simple black plastic hole plug, or an acorn head bolt or similar.
These just give it that trick custom look that is truly unique.

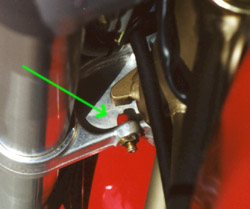
trick you can still do (that was submitted to me by Tom McCarroll)
is flipping the mounts over so that the threaded hole faces down.
Simple and very effective.
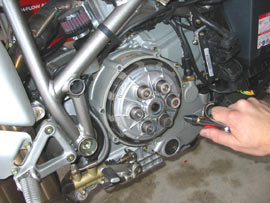
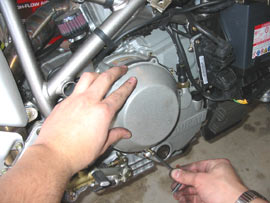
you have a dry clutch but
don't have the bucks for a
vented cover, you can still
swing it. Start by removing
the stock cover (make sure
your bike has a dry clutch!),
then blow out the dust built
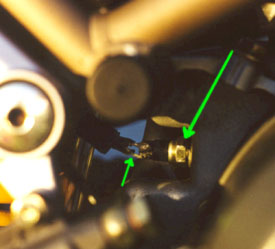
up inside. You won't need to
remove two of the bolts (the
ones that don't hold the
cover on indicated by the
larger holes on the cover)
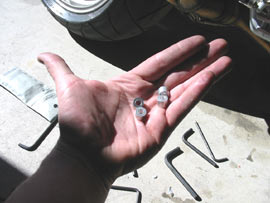
You'll find a lot of dust in
there. Then, head down to
the hardware store and find
some 5/16" inner diameter
(double check your bolt size)
aluminum spacers. Then
place the spacers behind the
cover over the bolts, then
apply some RTV silicone or
Locktiteto each bolt and
tighten the whole assembly
back down.
not forget the best part, and that is the signature Ducati dry clutch can of marbles sound!
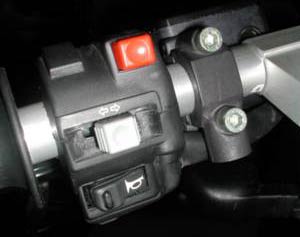
SIDESTAND SAFETY SWITCH DISENGAGEMENT
Evoluzione that will work great if you don't feel like cutting into any wires.
NOTE: Performing this mod will prevent the bike from shutting off if placed into gear. ALWAYS REMEMBER the
sidestand if you don't want to crash. Perform this mod at your own risk!
The following steps describe the process of disengaging the side-stand switch and eliminating its wire. In essence, all
you need to do is take the 2-pin connector and connect the BLUE wire running to it - to ground. All other work is to
make sure it looks pretty. The entire process should not take more than 30 minutes.
You will need the following tools:
- 1 metric #6 bolt (M6)
- 1 6" length of electrical wire (gauge 18, about)
- a needle (or a tiny watch screwdriver)
- 1 metric #8 size wrench/head
- Electrical tape or heat shrink tubing
- Screwdriver
Step 1: Use the M8 wrench/head to remove the side-stand switch/wire assembly (easier done from the right side of
the bike).
Step 2: Trace the wire up to the first connecter (this is where all of the work will be done) and unplug the switch
wire assembly.
Step 3: Pull out the 3 wires running into the connector of the disconnected side-stand assembly (use the needle to
carefully pull out the red cover inside the connector. You now have access to the locking mechanism of the 3-pin
connector. Once again, using the needle, carefully push out on the tab next to each pin, while gently pulling on the
actual wire on the other side of the connector.) You now have an empty 3 pin connector.
Step 4: Take the 6" length of wire and insert it into the side of the connector marked "1". Wrap with electrical
tape to keep the wire sturdy in the connector. Heat-shrink tubing would work as well (if not better). Connect the
connector back to the 2-pin connector running to the bike.
NOTE: you should see the new wire connect to the BLUE wire running to the bike. The other - BLACK - wire is left
unused.
Step 5: Strip the end of the 6" wire, make a loop, and secure it with the M6 bolt to the chassis.
You are done. Enjoy!
PS. If the bike doesn't start make sure that the new wire actually connects with the blue wire in the connector (can
use an Ohm meter if you want to get scientific), and/or that you have made a good connection with ground (chassis).
thought that they were pretty much worthless. Once the rubber rips, there is no saving them. Why would Ducati
use these? Well, I received an e-mail that explained why they were used- because there needs to be a flexible,
insulated, yet strong method of securing items. The reason they were on my fairing is because they would hold it on
without stressing the mounting holes (which would lead to cracks) using a minimum of tightness. When compressed,
they back against each other, and act sort of like a lock washer. My fairing was mounted with well nuts, and the
rubber ripped after several tightenings (over tightenings that is). You may also know that you can't buy well nuts
just anywhere. Some retailers (McMaster Carr, MSC and your local Ducati dealer) sell them, but they aren't as cheap
as my replacement and also not as readily available. To replace them quickly without parting with much cash, here's
what I did:

with the groove in the middle, available at any hardware store. I think
they were 3/8".
well, but it works well for misers like myself. It's also very stable and you
can tighten the bolts to your liking rather than risk cracking whatever it is
you are mounting (the nylon won't let the nut back off).
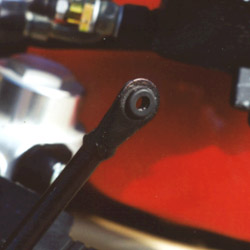
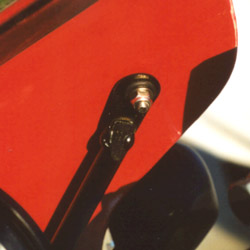
tight space and bashed the hell out of your frame and forks? I have, so
I took a simple little vaccum cap and topped the ends of the steering
adjuster bolts. That way, when the steering is put lock to lock, it has a
nice cushion and you can maneuver without tearing your bike up.
common problem on Ducatis, and it generally is the fault of the wires
on the neutral light switch. On the back of the engine, right side, near
the shock, is a long plug threaded into the block. Pull back the rubber
boot and check that the wires haven't come loose. I checked mine, and
one wire was completely off. I marked which wire went on which
terminal and then unplugged the wires from the socket up under the
side cover. Then I took the switch out using an end wrench (which
took at least twenty minutes). Once the switch was out, I soldered the
broken wire back onto its terminal. Be careful when doing this,
because the plug is plastic. Solder a little at a time to prevent melting
the plug. Once the wires were soldered back on, I took the washer off
of the plug so that it seats further into the engine (another common
problem is that the plug doesn't seat far enough in to engage the
switch), then threaded it back in. Be careful when doing this to avoid
ripping off your newly soldered wires (which I did). Once it's in, take
the wrench off, put the boot back over the wires, and plug them back
into the socket. Ta-Da! A neutral light that works again.
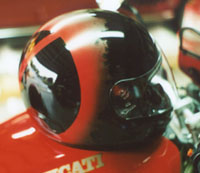

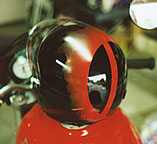
(the frisket used for airbrushing). I first took a compass with two needles, stuck one in where
I wanted the center, then lightly scratched the circle onto the helmet (you can't draw on the
gelcoat). Then I slowly applied the mask to the circle, left the line through the middle of the
logo unmasked, and sprayed the paint very lightly, fading out around it. It went way further
than I expected, so i took some Mother's cleaner wax and buffed off the paint I didn't want. It
is surprisingly durable, seeing as how I didn't primer it first. It's very subtle and was easy to
do, and it looks quite cool from behind.
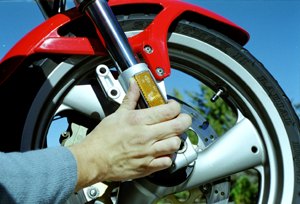
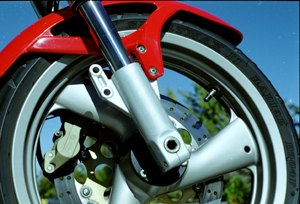
removed the reflectors on my forks because they are pretty tacky, and I heard that there was a cool Ducati logo
underneath. Well, there wasn't. But, it did clean up the front a little. To peel them off, all I needed was a little
brute force. It is better if they are cold when you do this so the glue isn't very tacky. You place your palm over one
end and push from the side. This is much easier than trying to pry them off. With the pushing to the side method,
they simply pop off. If you feel that the tape is sticking to the fork, switch to the other side and push from that end
and it should come off better. If any glue sticks to the forks, a little WD-40 should take it off.
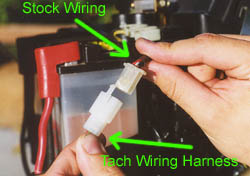
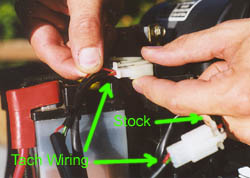
Ducati Performance aftermarket tach (for Monsters of course, but I'm sure it's similar on other bikes) and run the
smallest of the wire connections through the hole in the new dash (you did get a dash pod for the tach, didn't you?).
Then plug the connector into the tach and mount the tach down in the dash. Then you lift the tank and locate the
black ignition module (black box on the outside of the coils) and unplug the connector from it that has three wires.
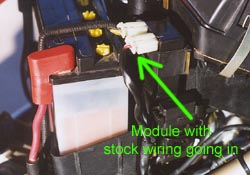
harness that it could possibly plug into), then plug the connector on the harness into the module. You're done. All
of this is assuming, of course, that you took the time to run the wiring harness from the tach to the module in a
neat manner. If not, you'll want to do that so the wires don't flop around or become damaged by heat or vibration.
Thread
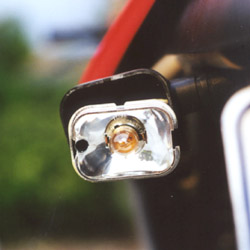
cracked on the screw post and simply vibrated off (couldn't have anything
to do with my mufflers, could it?). I could have saved it with some super
glue had it stayed on the bike. I came up with a simple way to keep them
attached in case this happens again.
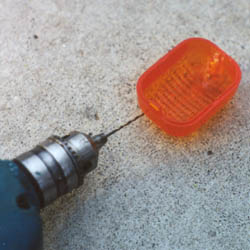
the inner side of the lens. Then take a piece of orange thread and go
through one of the holes from the inside, then back through the other
towards the inside.
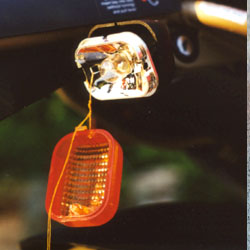
and tie it through the hole on
the inner side of the
reflector. On some reflectors
you may need to drill a hole
because there isn't one there.
Once the lens is screwed on,
you can't tell that this has
been done, but if it falls off
you will be able to salvage it.
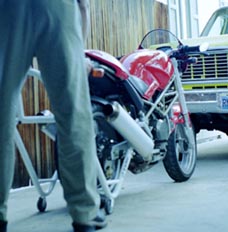
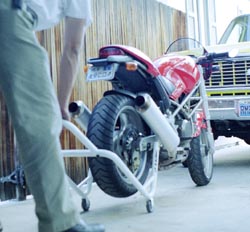
So you've got a rear stand, but now what? Your friend isn't around and you need to lift your bike. Don't worry, it is
possible to do it, even with the suisidestand that gives out when the bike is lifted upright. Start by standing behind the
bike and lining up the stand on the left side with the swingarm. Lift it up to make contact, and get ready for one
continuous motion. Start applying pressure to the stand, then the bike tips up and to the right, and slowly will tip
over until it contacts the right side of your rear stand. If you have an auto stand, it will give way and shoot up. Don't
stop now, or the bike will fall. Slowly continue to apply pressure and the bike will straighten itself out and contact the
right side of the swingarm. Now you've got it balanced and contacted on both sides and you can continue with lifting it
all the way up. It seems a little sketchy, but I've never dropped my bike doing this. You just have to trust the laws of
physics and go for it. However, I did drop it setting it down once because there was WD-40 all over the swingarm- it
just slipped right off the "no-slip pads"
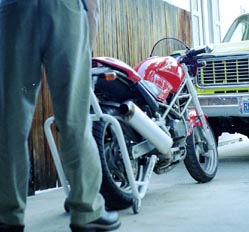
then reach over with my foot to hold the auto stand down, and slowly (while holding the bike up with my body) let the
bike tip over onto the stand. You're good to go. It's a little trickier, but concentrate and take it slow and you should
be fine. Good luck, and quit staring at my butt!!
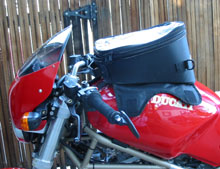
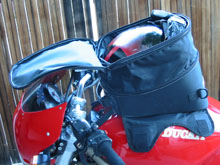
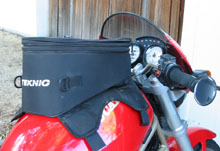
my helmet. It's held on by a strap at the front and magnets on the sides.
Before, I would always wear a backpack, but that was a pain taking it on and
off while wearing a bulky leather jacket. The bag is MUCH better. I don't
know why I never got one before! I highly recommend one if you carry
anything too big to fit in your pockets.
One more thing- if you decide to take apart the fuel pump trying to track down problems, be sure to assemble it
correctly. After chasing down water in the system, I got my bike back together and running. Only problem was,
it would run perfectly fine, then when the tank dipped below half, sometimes it would simply bog down and die. I
couldn't give it more gas to accelerate, it would just die. I knew it was either hitting patches of bad gas or
running out of fuel, but I couldn't figure it out. Then I took the pump apart to check it out again and realized
that I had assembled the cover plate in the wrong position. It is a pentagon shaped piece with two bubbles, and
the bubbles correspond with the chambers inside the pump. The vaccum from the engine keeps the pump
working, and each chamber has a separate pressure. When I installed the cover wrong, it made it so that the
chambers were kind of merged in a sense (not sealed separately) and it wasn't working. When the gravity would
no longer feed the tank, it would die. So, be careful when taking the stuff apart.
There really isn't an appropriate place for this, but I consider this a tech tip because it can save you a
considerable amount of time and money. Recently, I filled up at a gas station, and soon after started noticing a
slight surge on acceleration. It was as if the bike was being kicked from behind. I fiddled with the adjustment
screws, and it only worsened. Pretty soon I was bucking and surging like a bull rider. I tore the bike down to the
carbs and wasted an entire weekend looking for the problem. I took half the carbs apart and inspected them,
drained the entire fuel system with a suction gun, and performed every possible test I could. I filled the bike
with fresh gas from another station, and added Sta-Bil to it. Still no luck. I was ready to order a carb rebuild kit,
jets, filter, etc. Then I decided to try one last time to add fresh gas. I did, and about a mile or two later, I started
noticing it running better. Then another mile or so later it was back to normal. So, if you experience rough
running or surging all of a sudden, first suspect a bad batch of gas. Drain the whole system, run it some more
with fresh gas, then add some more. Also, don't add Sta-Bil. I think that was half my problem. It only aides in
gas storage, but it doesn't remove water and it only dilutes the mixture. If it still doesn't respond after several
batches of fresh gas, the problem is most likely something deeper.
herein are those of myself and do not reflect those of Ducati or its affiliates. The "DUCATI" logo and "Circle D" are registered trademarks of Ducati Motor
Holding, S.p.A., all other content on this website is copyright 2006, Monster Man Productions.