FOR THE DO-IT-YOURSELF DUCATI OWNER
WARNING:
After testing the mufflers for the first time there was an extreme popping upon
deceleration.  So, until I can find a cure I suggest not tearing into your mufflers.  
It looks as if I need to richen up my Power Commander.  If you don't have any PC
or chip to put in, I suggest not performing this mod.  I don't want you to do any
irreversible mods and have it sound like crap.  Thanks.
MUFFLER MODS
$0
Drill and Bits, Hammer, Chisel, Safety Goggles,
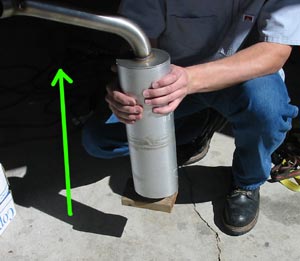
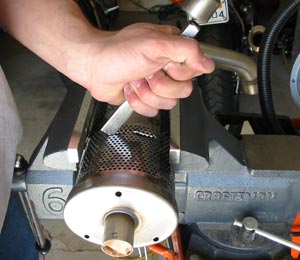
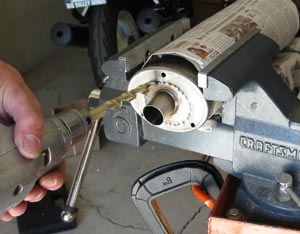
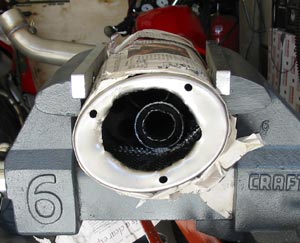
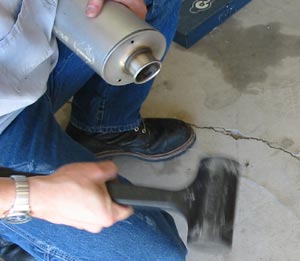
Sawzall, Vice or Clamp
The first step is to clamp the mufflers securely in either a vice (best
choice) or to a table using a c-clamp or something similar.  Then,
take your drill and drill out the three rivets on the end and the two
rivets holding the bracket on the side.
Then tap the rivets out with a straight punch.  Be sure to wear your
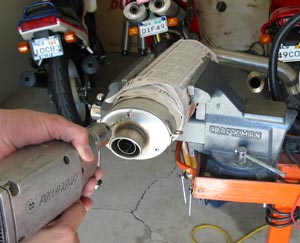
safety goggles for all this impact work!
Then you can attack the rear- take a chisel (not a wood chisel!) and
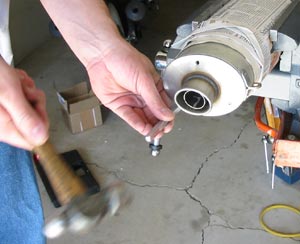
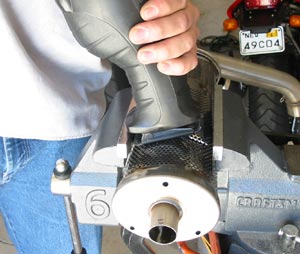
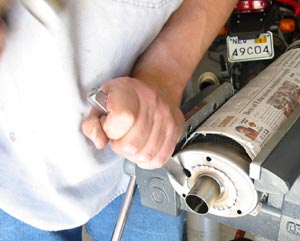
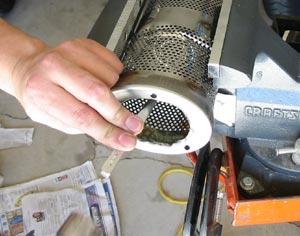
tap around the perimeter of the end cap to separate it from the
aluminum shell.  You'll see that it'll come free with some effort.
After it comes free, you can change angle and drive it completely
out.  It'll just drop out once you pound it out enough.
Then, find a block of wood or a stack of newspapers to pound the
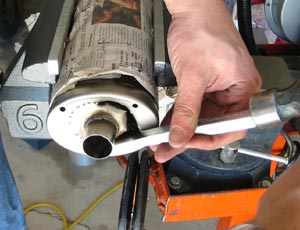
end on.  Grip the whole muffler like shown, and raise it up like a
caveman trying to bludgeon dinner.....
...and come down hard and square.  After a couple of these
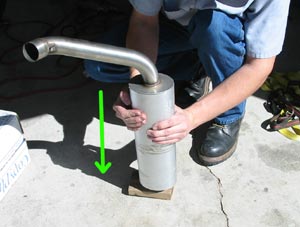
bashings, the shell should separate from the body of the muffler,
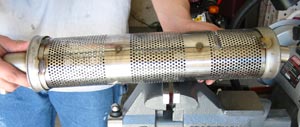
and you can drag it out.  The pic I took of what it likes like after
this didn't come out, but scroll down to the reassembly to see the
packing you will encounter.
Now to get rid of the other half.  Take the end cap that we whacked
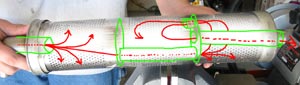
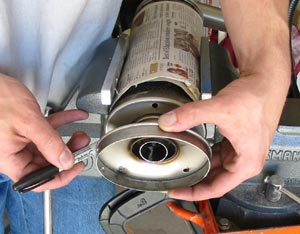
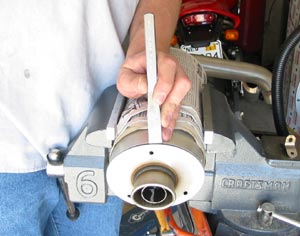
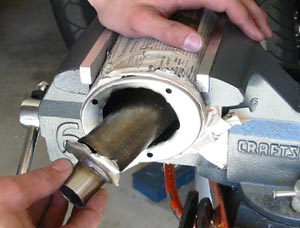
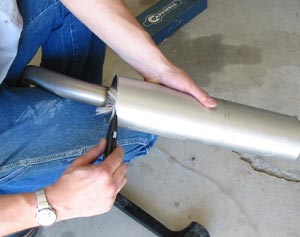
out, and trace around it on the end of the body to get an idea of the
size of hole we're cutting out.
I tried several options on the first muffler I did, and nothing
worked as good as this method.  Plus, it's cheap.  So, we first take
our center punch and tap all along the line we drew so that it has a
bunch of punch marks in it as a guide.
Then we drill a hole big enough to get our chisel
started.  That's right, chisel!
And hack away!  Make sure you're using a nice, sharp, durable
metal chisel and safety goggles.  I tired a holesaw, a grinder, I tried
drilling all the way around, and I tried the reciprocating saw, but
they all were less than ideal.  This metal is TOUGH, and the chisel
surprisingly ripped right through it more accurately than I thought.
The reason why we tapped all the way around was because it gives
the chisel a sort of track to follow.  The total process took only
about 5-10 minutes each.
Once you're done, the two tubes we cut out just fall right
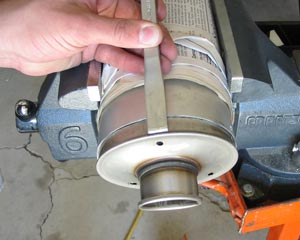
into your hands.  We can ditch those now.
And here we go.  The hole is obviosuly not straight, but it
makes no difference to me since: a) it'll be covered by the
end cap, and b) it doesn't affect the operation or integrity
of the muffler at all.  So, you can grind yours down but in
my opinion it's a waste of a bit.
Then we can tap the perforated shell back into
semi-original condition from when we hacked it open.
And, now for the wrapping.  Again, I put this back in
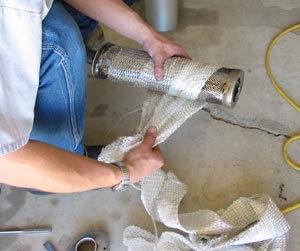
because I like my neighbors.  Just wrap it like you're
wrapping electrical tape- nice and tight and even.  But, be
careful, this stuff is murder.  Its little synthetic fibers
embed in your clothing and skin, and itch and scratch like
hell!
Then you can slide your shell back on.  If the packing is
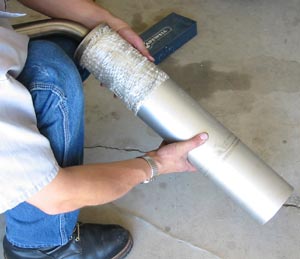
tight enough it should go on very easily.
When it gets to the end, you'll need to tap it back down.  Take the
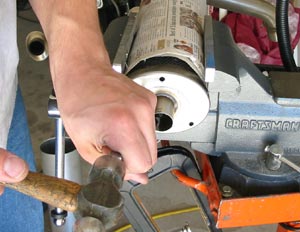
body and tap it hard on something soft, like a stack of
newspapers.  I used a tree stump, but this picture is just for
illustrative purposes.  You don't want to bash up the aluminum,
so don't whack it too hard.
Then you can take the end cap and tap it back into place.  I used a
rubber dead blow hammer.  Make sure you get the cap right side
up so it lines up with the holes in the side and top correctly.
You can cut off the fibers sticking out the end with a sharp knife.
And here we are.  I haven't yet riveted the ends because I don't
have a high quality riveter yet, but it's  a simple step that I don't
need to explain.  The difference is clear-  I can't wait to hear how
it sounds!
This page is in no way associated with Ducati.com, nor is it an entity of Ducati Motor Holding, S.p.A.  All content, information, and views expressed
herein are those of myself and do not reflect those of Ducati or its affiliates.  The "DUCATI" logo and "Circle D" are registered trademarks of Ducati Motor
Holding, S.p.A., all other content on this website is copyright 2006, Monster Man Productions.


So, here's my superbike muffler mod.  It is not a "core" job in the traditional sense (I
don't possess the knowledge to tune the baffles correctly), and the intention was mainly to
let out the true Ducati sound.  Had I been going the full performance route, I would have
hacked open the entire muffler and replaced the innards with straight pipe.  But, I like my
neighbors and the 998 is powerful enough for me, it just doesn't sound like it stock.  So, I
took out essentially the last obstacle, which is the exit pipe, and left the rest intact.  I used
this page as a starting point, but went off in my own direction obviously.
With the packing removed, you now have this fancy perforated
body. When the exhaust exits into the muffler (represented by the
red lines), it goes into a preliminary chamber (the muffler is
separated into three chambers by baffles).  Some of the pressure
leaks off there, but the rest finds it's way into the middle section by
way of a tube.  The gasses don't bleed off into this middle chamber,
but rather flow through it into the final chamber.  Some of the
pressure bleeds off there, but this is where it gets interesting.  The
rest of the gases are forced to make an abrupt u-turn if they want
to escape.  So, they double back through two tubes above the one
they just entered that leads back into the second chamber.  Then,
they have to make ANOTHER u-turn and head into the final exit
tube and then straight out the back.  You now know why it's so
quiet and makes so little power.  Our mission is to eliminate the
final exit tube, so that the gases exiting the middle chamber can
then exit straight out the back rather than deal with all the u-turns.
   
So, we first chisel the top of the perforation open over the final exit
tube in the third chamber.  We do this about an inch back from the
baffle so that when we cut the tube off we don't catch the other
inner tubes.  We also don't cut all the way around because once the
exit tube is cut off there would be nothing holding the body
together.  So, cut as little as you possibly have to to gain access with
the sawzall.
Now, we take our trusty reciprocating saw with a short, fast-cutting
metal blade, and go to work.  There are other methods, like maybe
a grinding wheel, but they would take forever.  Use what you have
to, but the reciprocating saw makes short work of the tube- it's
really tough and thick, and actually there is one tube inside the
other.  We have to get rid of both.   Make sure your blade is short
enough not to punch through the other side when it travels.  If you
have to, break down a blade by sticking it in a vice above where you
want to break it, then whack it off with a hammer- WEAR SAFETY
GOGGLES!!!
1